FAQ: Timers
Table of contents
What are timers?
Timers will help you track how much time you are spending on your projects. Unike its competitors, Apollo’s timers are extremely advanced and will make your time-tracking life immensely easy.
How do I log how long I've just spent on a task?
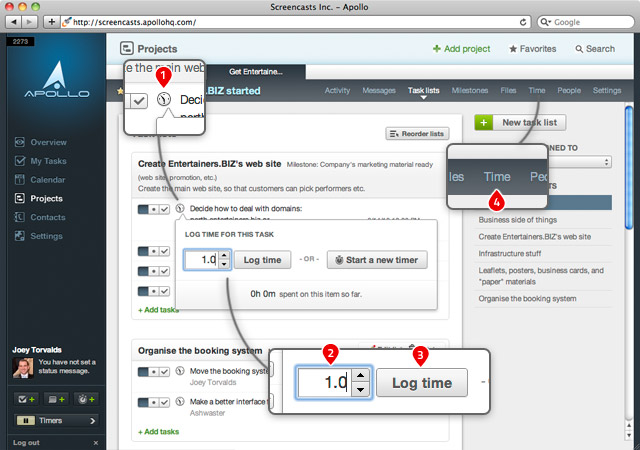
Go to your project, find your task, then click on the little watch icon you see next to the task itself 1.
You will see a form that will ask you how long you spent on this task. For example, pick “2.0” (hours) 2 and click on Log time 3.
At this point, if you click on the Time tab for a project 4, you will see all the time logged for the project.
How do I start a timer?
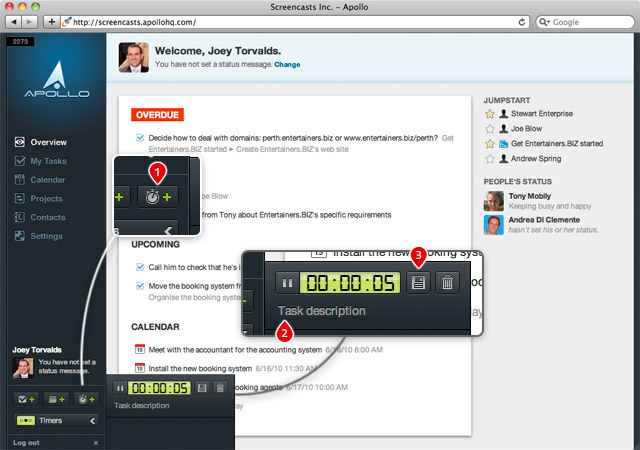
Just click on the little watch icon on the left hand side of your Apollo screen 1.
A new timer will start immediately. You will probably want to rename it by clicking on Task description in the new timer 2.
Once you’ve completed your task, just click on the tick icon on the timer itself 3. Before saving, you will be able to assign the logged time to a task, and make final adjustments on how long you spent on that task.
How can I see my interactive timers?
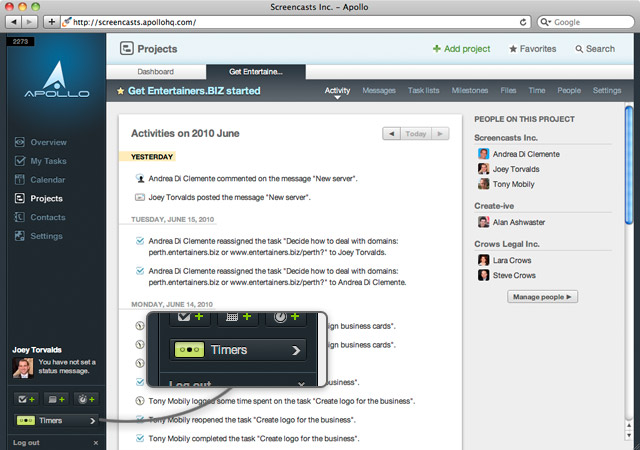
To see your interactive timers (that is, the ones that haven’t been saved yet), just click on Timers on the left hand side.
All your unsaved timers will appear. Keep in mind that only one timer will run at one time. From here, you are able to switch which task you are working on and would like to have timed.
Can I pause an interactive timer?
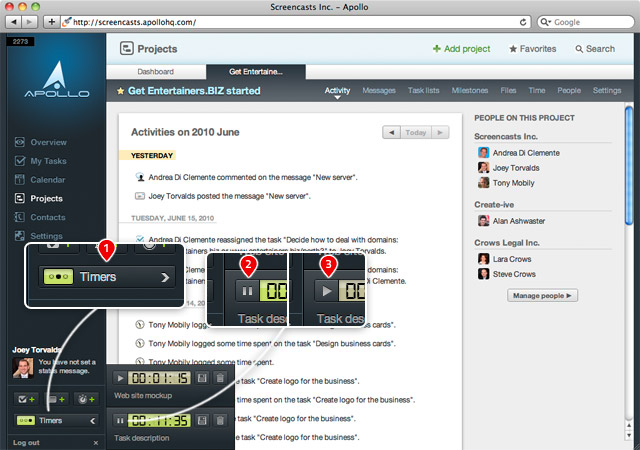
Yes, you can pause an interactive timer. Just click on Timers on the left hand side 1, and click on the Pause button on the left 2. To start again, just click on the same button which will look like a Play button 3.
Where can I see how long I have spent on tasks?
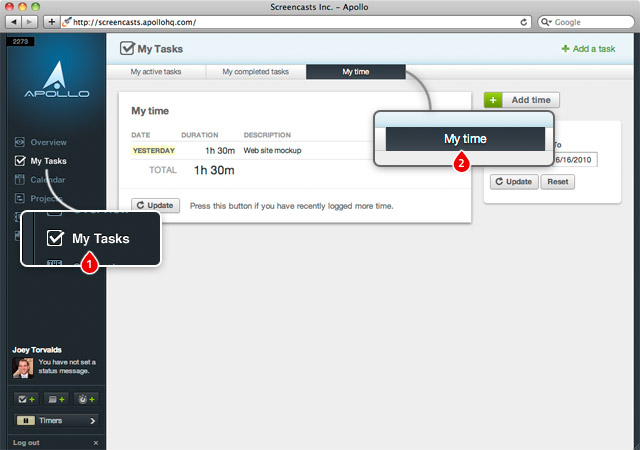
To see how long you have spent on tasks, just click on My tasks 1 and then the tab My time 2.
This will tell you exactly how you spent your time (including timers connected to specific tasks).
Where can I see how much time was spent on a project?
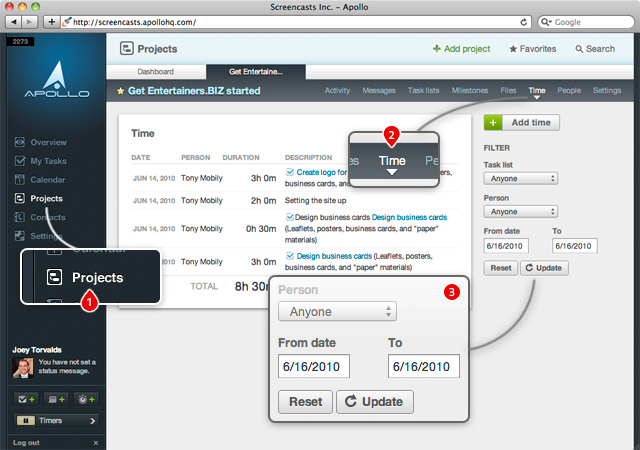
To see how long has been spent on a project by everybody involved in it, click on Projects and select a project 1, then click on the tab Time 2.
In this screen, you are also able to filter by task list and/or user 3; this will allow you to create more detailed reports (for example, how long a task took or how long a specific person worked on a task, and so on).