Getting started
A quick guide to make your first steps in Apollo.
Apollo is an online workspace where you can collaborate with your team, plan events, share documents and files, manage your contacts and organize your work. It does not matter what you are up to (building your new mobile app, organize your home renovation or your next vacation trip), Apollo is easy to use. Here’s how to get started!
A look at the user interface
Apollo is divided into sections (Overview, My Tasks, Calendar, Projects, Contacts and Settings), which you can easily reach using the links on the left of your screen 1.

The central working space 2 changes depending on what section you are in. Each section then has a tabbed-like menu on the top 3 and eventually a sub-menu (like “Milestones” under “Projects”).
Navigating through the sections and menus is easy and intuitive.
Branding and color scheme
If you have just created your new workspace, you can add your company logo, choose one of the pre-defined color theme to better suit your company brand, define your language, your timezone, and a default invite message used for inviting new users.
To add your company logo
- Click
Settingson the main menu. - Click
Company identityon the right side menu. - Click the
Browsebutton nearMain logo, in the `Logo section. - Select your own logo file and confirm.
To select a color theme
- Click
Settingson the main menu. - Click
Company identityon the right side menu. - Scroll down and select one of the pre-defined color themes to use it.
All changes will take effect immediately after you save them, you do not need to reload your workspace.
Invite other people
The next step should be inviting teammates to work with you, either as internal or external users.
Read more: FAQ on Users
To invite a teammate as an internal user
- Click
Settingson the main menu. - Click
Internal userson the right side menu. - Click the
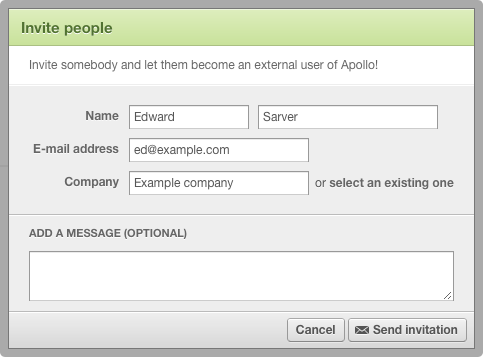
Invite peoplebutton. - Type your teammate name, its email address and an optional message.
- Click
Send invitation.
Teammates will then receive an email with a link and thus be able to join to the workspace you created.
Even if teammates have not yet joined the workspace, you can assign them tasks or include them in projects. Apollo will not send them notification emails until they have their own account, though.
Create your first project and tasks
Apollo lets you organize your work very easily: you will be able to create new projects and add tasks, which can then be assigned to their responsibles.
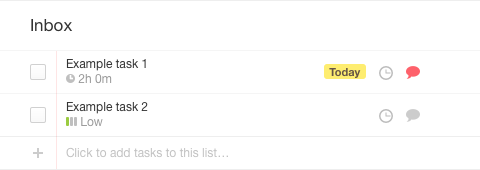
Each task has its own page, where you can see detailed information on each task such as who created it, whom it was assigned and when. It is also possible to make and read comments on each task: when there are new comments on a task, a red conversation bubble will appear on the side of the task in the task list.
To create your project
- Click
Projectson the main menu. - Click
Add projectin the top right portion of the screen. - Type in your project name.
- Click
Add this projectto save the project and open it.
To add your first task
- Within your project, click the
Tasksbutton. - Click the
Add a taskbutton. - Type a description for the task – optionally select a teammate from the
Responsibledropdown to assign the task to him/her. - Click
Add this task.
Search and favorites
Apollo also has an internal search engine which lets you search through projects, tasks and contacts with ease. When you find what you are looking for, you can add it to your favorites by clicking on the star near the name of each element. The Favorites button in every section will help you in reaching them faster.